How to set up SSL for an Azure web application using Let's encrypt
Learn how to set up SSL for an Azure web application using Let's encrypt, with this guide we have created to make sure you don't miss a thing.
Content
- Create your Web App
- Create el storage
- Register your app
- Create a Client Secret
- Give permissions
- Add the Let’s encrypt extension
- Generate the certificates
1. Create your Web App
The first step is to create the web app (if you already know how to do it, you can jump to the next one)
-
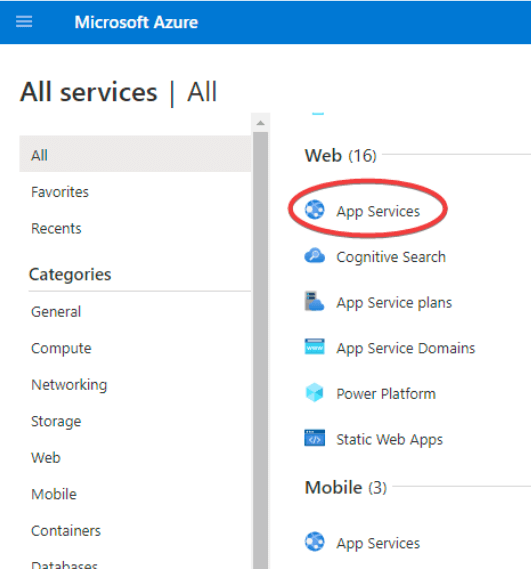
To do this, open the Azure portal and find the "All Services" link (Azure Portal Web App Service)

-
Select App Services within the Web Services.
-
Create the App
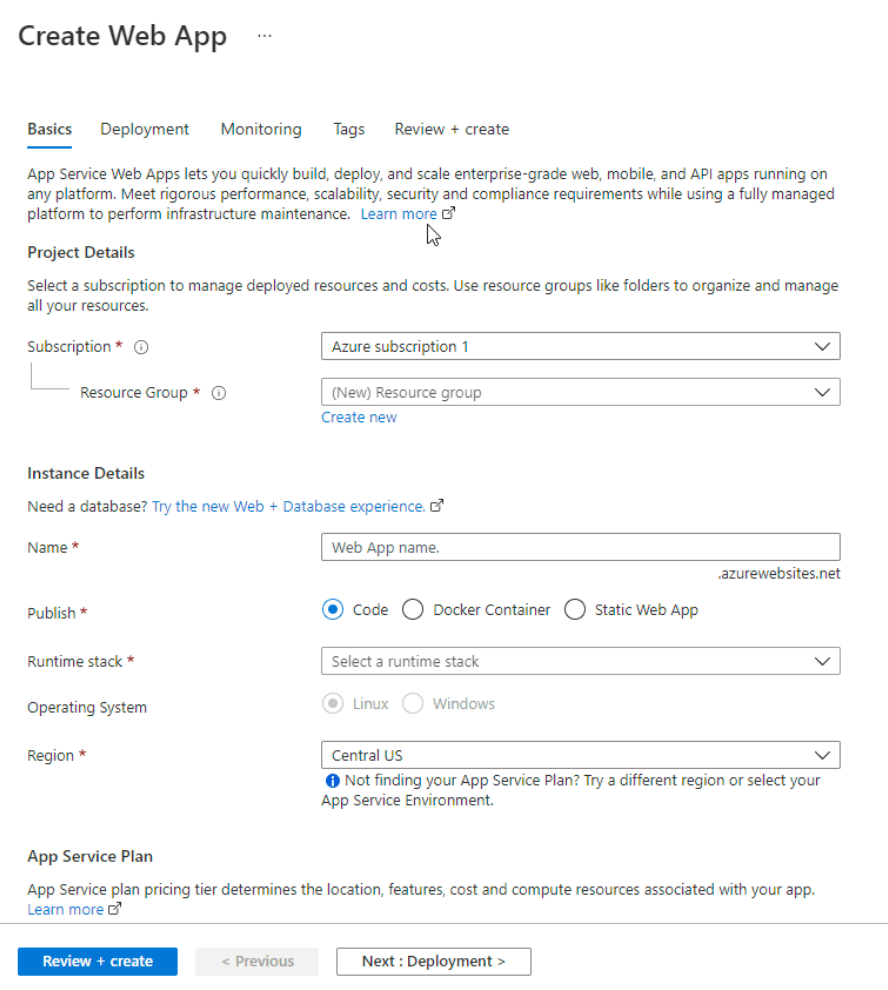
The system will require:
- Select the Azure subscription.
- Resource group (it is useful to keep our services properly organized).
- App name
- Runtime
- Region (*Must be carefully selected).
For further details on how to create Web Apps, visit the following link.
The procedure is very simple and Azure's portal provides a step-by-step guide.
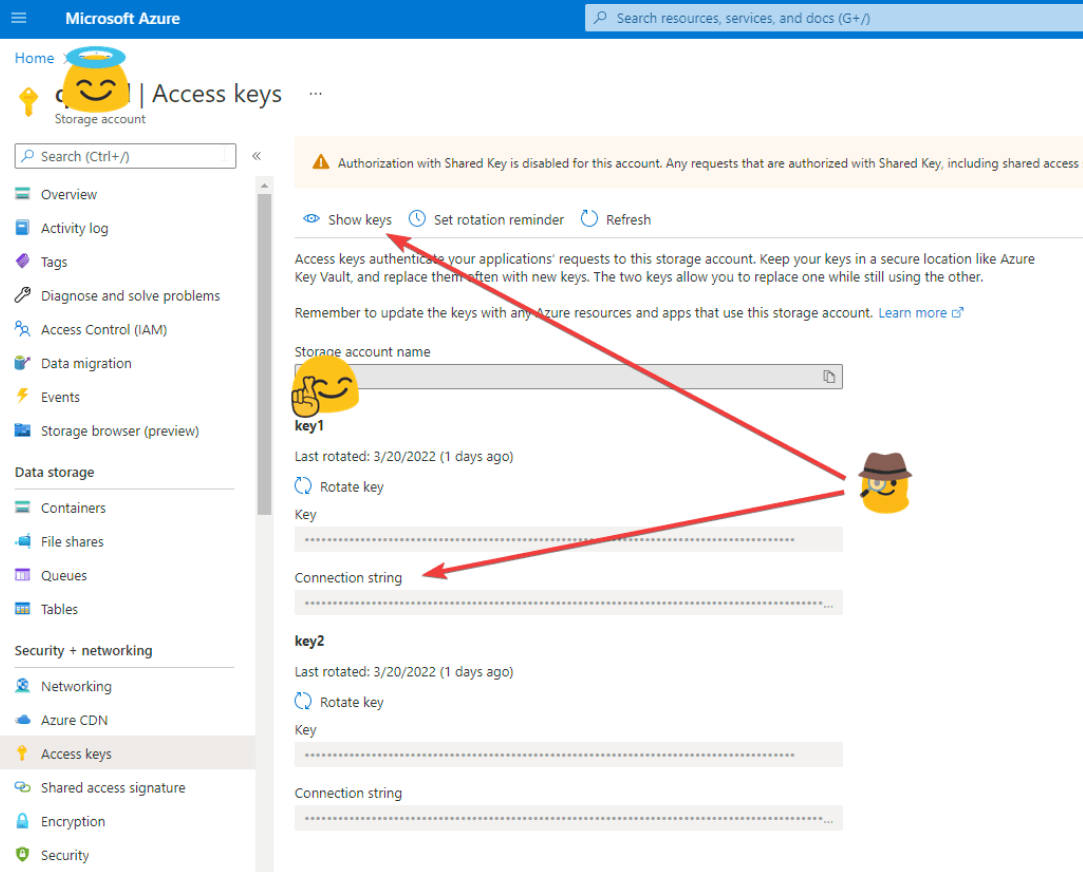
2. Create the storage
The next action is to create the storage for the certificates you will generate with let's encrypt.
-
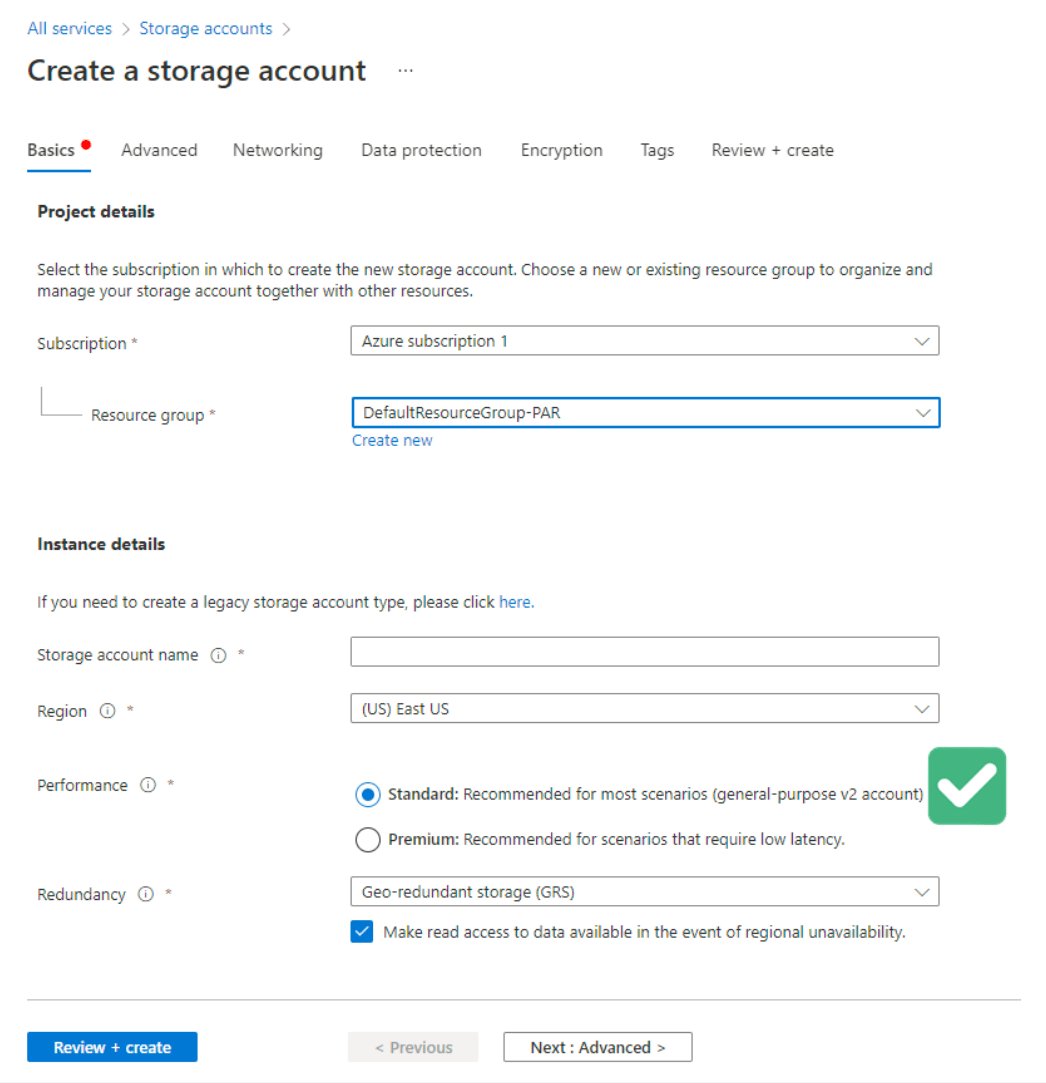
Go to Azure Portal a Azure Portal Storage Account. In the "All Services" section, look for "Storage" and select "Storage Accounts".
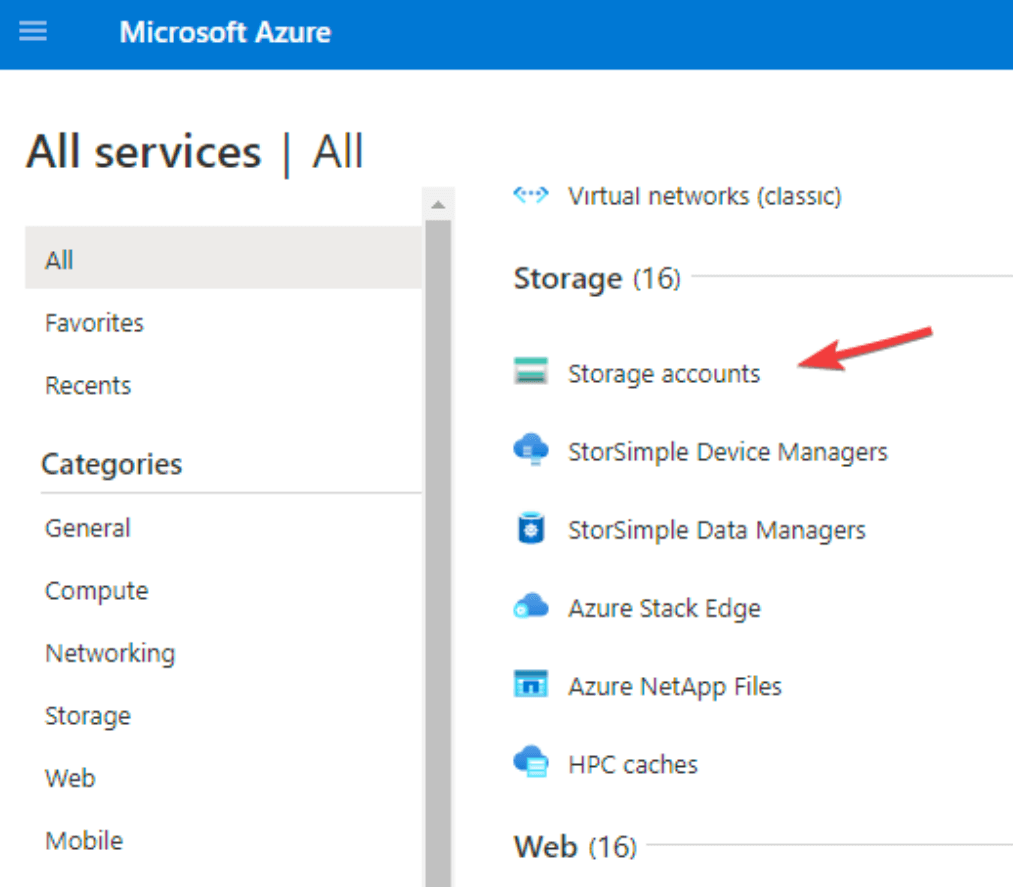
Important note: Do not use BlobStorage. You must use Standard or V2. 👨💻
For further details on how to create Storage in Azure, you can visit the following link.
-
Once the storage is created, copy its connection string to use it later. You can find the connection string by selecting your storage service in the "Access Keys" section.
Remember: Do not share these keys with anyone. 👨💻
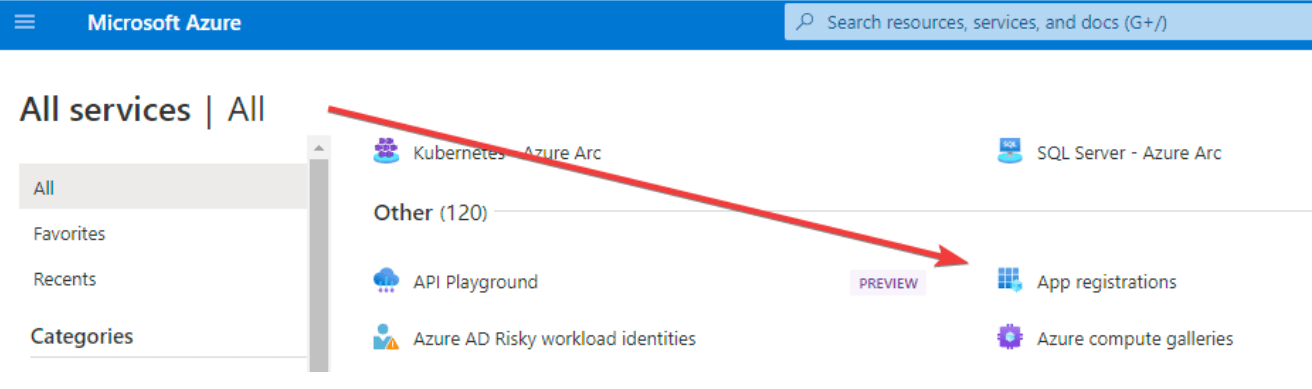
3. Register your app
It's time to register your App, which will connect the different parts.
-
Search among the Azure services: App Registration
-
It is important to provide the URL that you will use when registering your DNS domain.
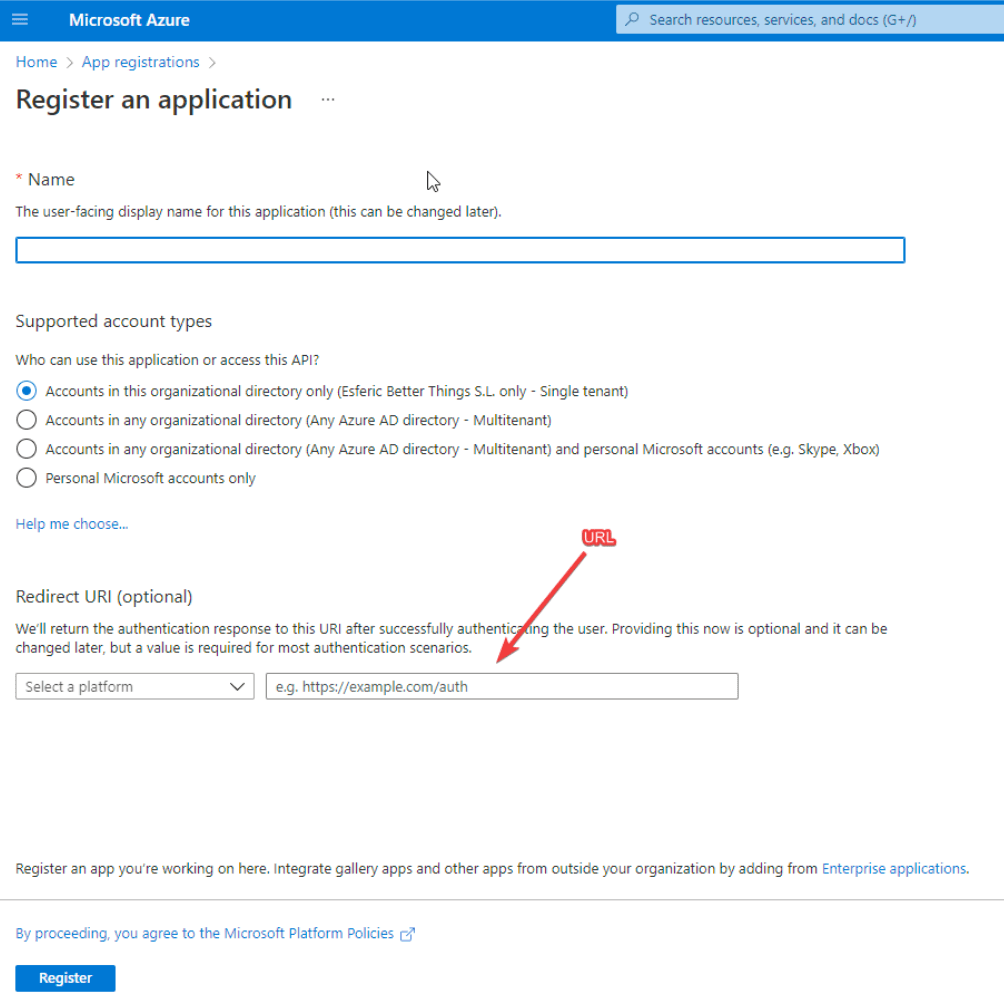
Important note: Once you have created your register, copy the "Application Client ID" since you will need it later. 👨💻
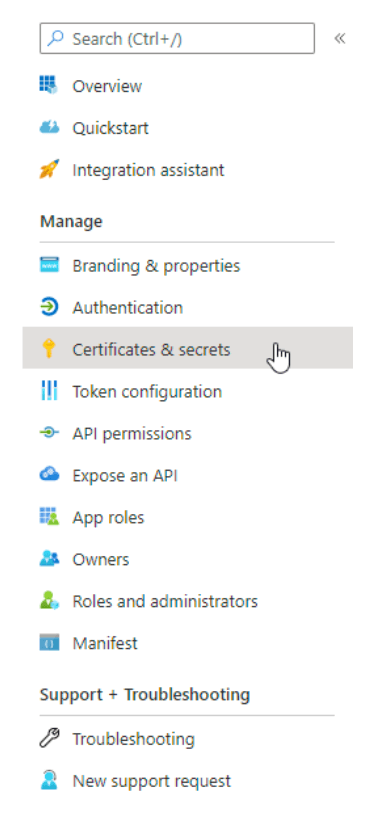
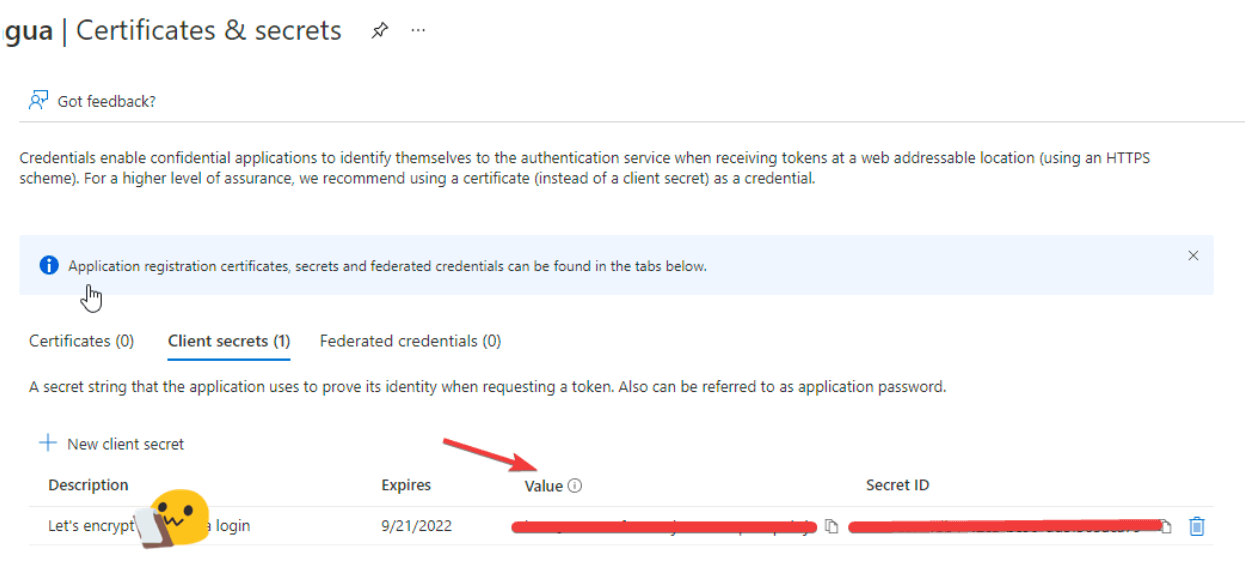
4. Create a Client Secret
-
In the App you just registered, select “Certificates and Secrets”
-
Important: Copy the "secret Value" because the system will require it later. 👨💻
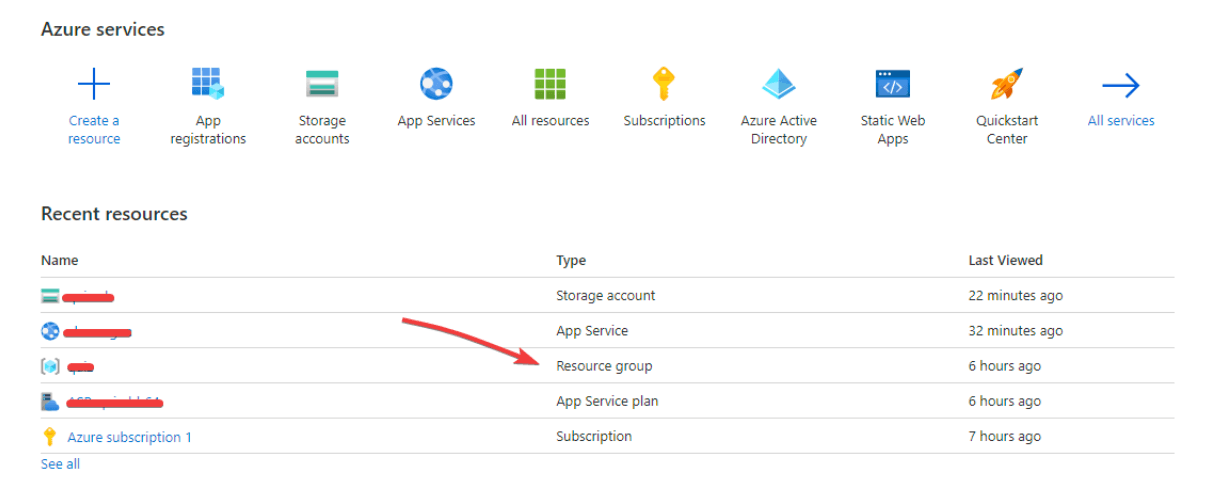
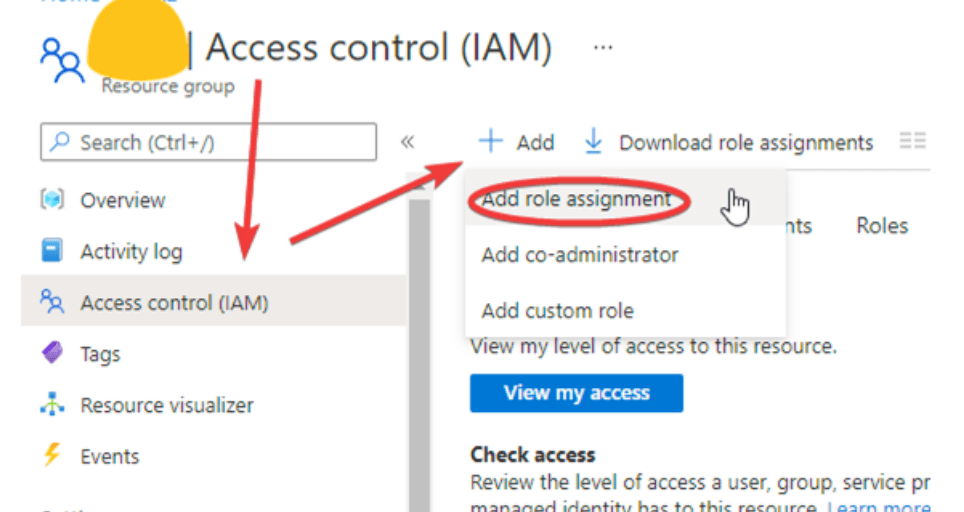
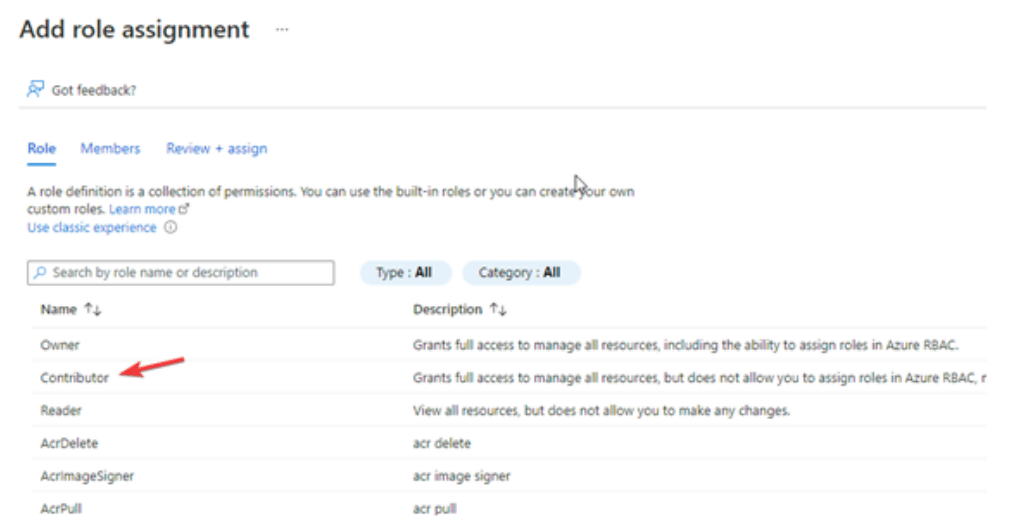
5. Give permissions
To continue, you should give permissions to the registry in the resource group.
-
Select your resource group:
-
Add the registered App as "contributor".
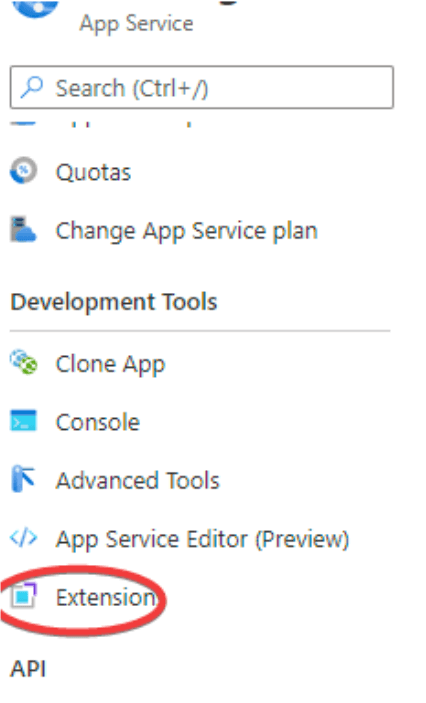
6. Add the Let’s encrypt extension
-
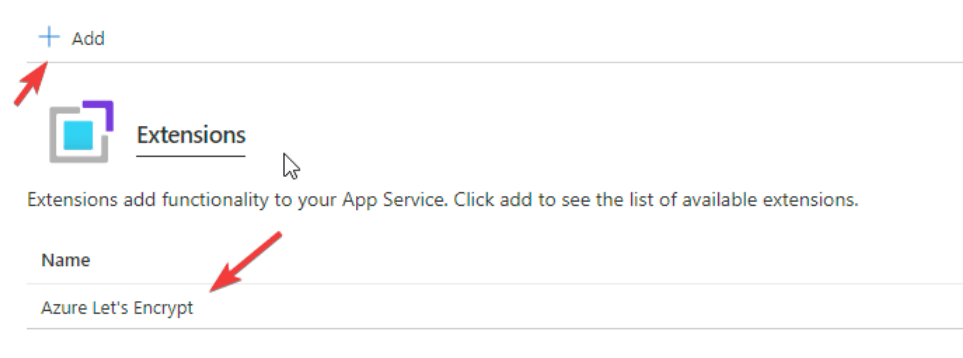
Now, find your web app and add Let's encrypt extension
You have to agree to the terms and conditions. Azure provides a step-by-step guide here.
7. Generate the certificates
The next step is to generate your certificates. Previously, it is necessary to configure the Bindings, your DNS, with the registers of the App. Here is a link for more information.
-
Once you have your custom DNS configured, select the "Let's Encrypt" extension to add to your Web App and click “Browse”.
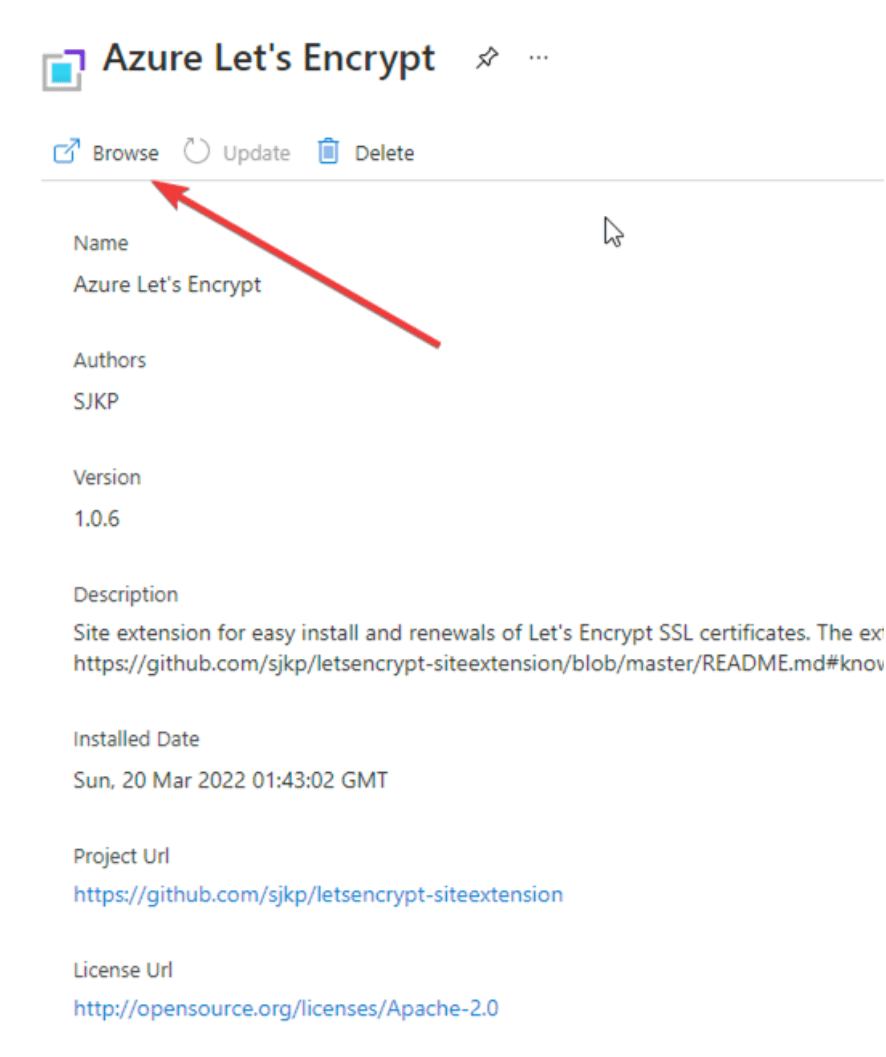
-
You will see a screen like the following:
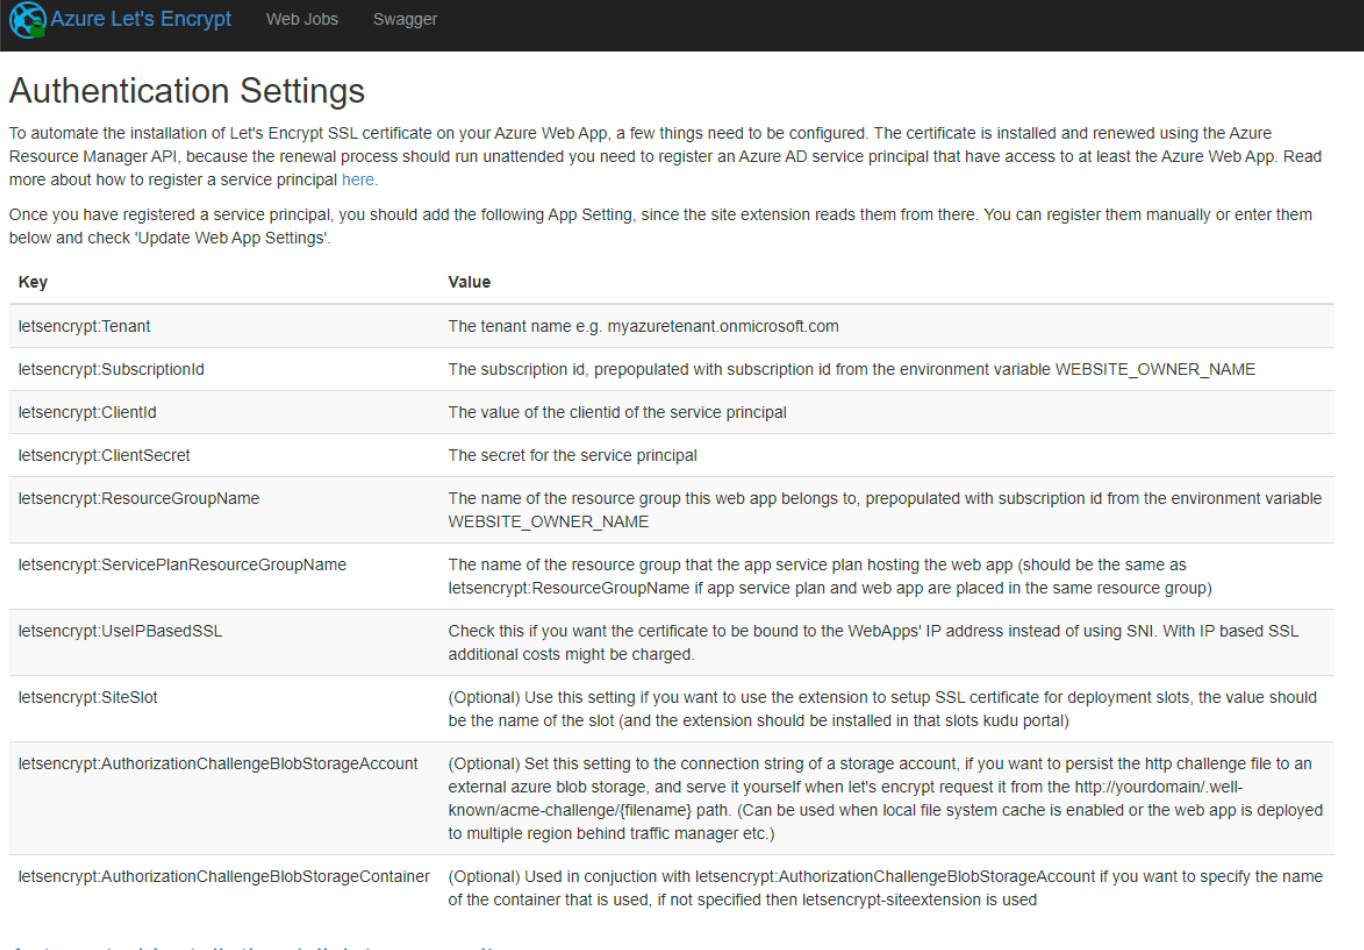
-
It will ask you to login:
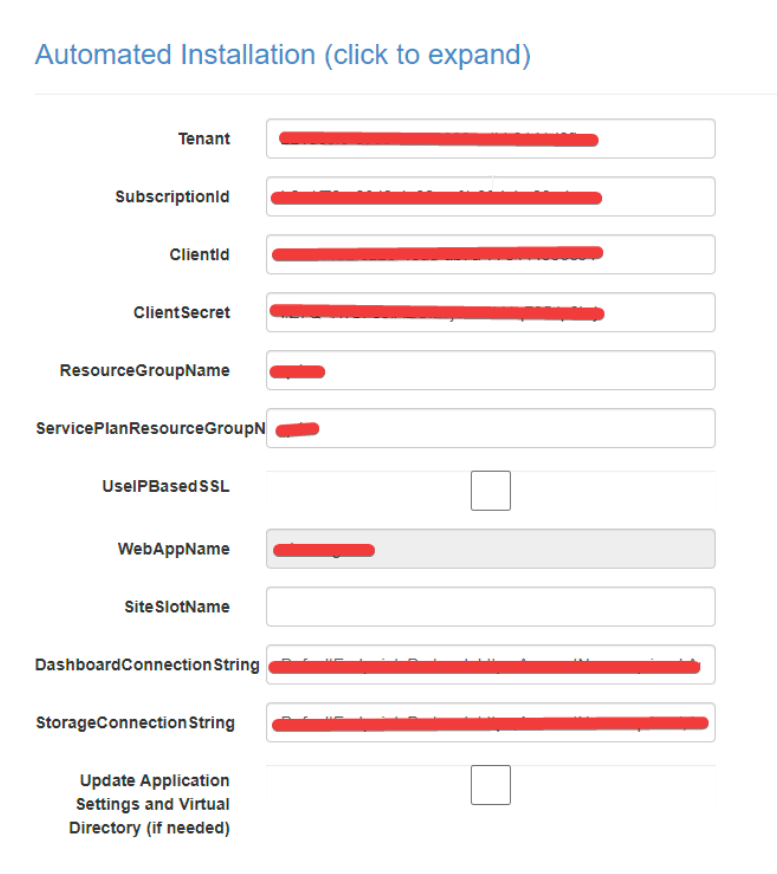
To complete this registration, please note the following:
-
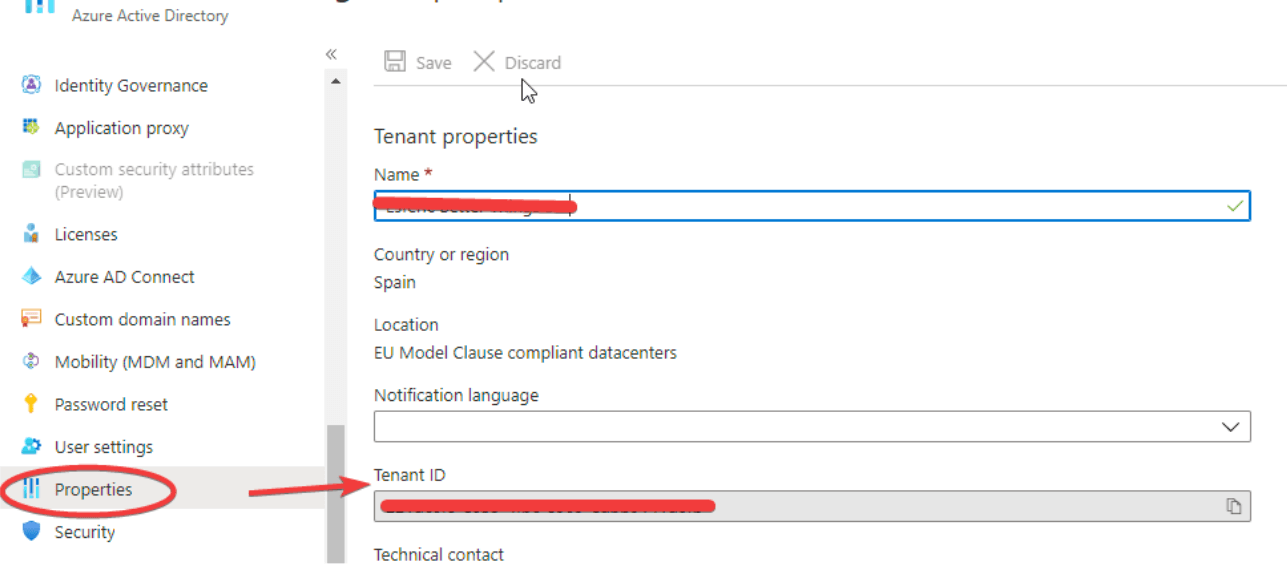
Tenant ID: to get this information, go to your Azure Directory -> Properties.
Azure Portal AAD
-
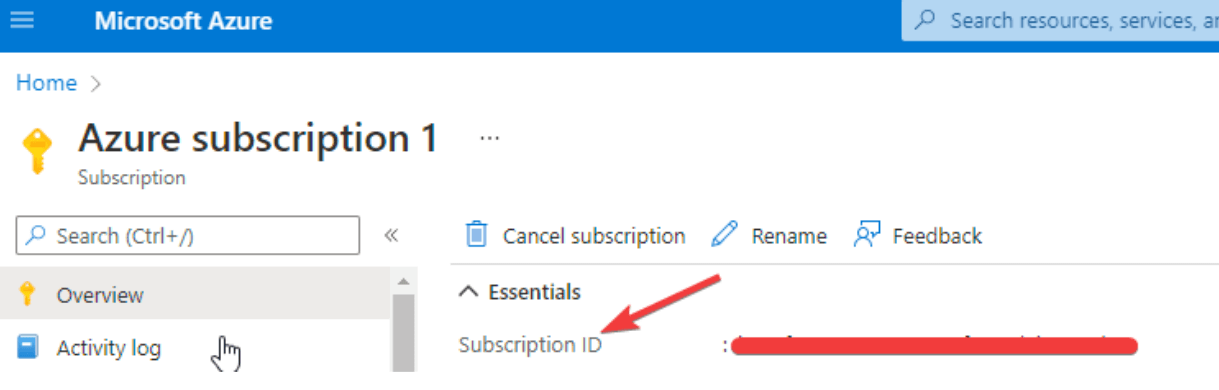
Subscription ID: to obtain this data, select your subscription.
- Client ID: is the registered App ID.
- Client secret: the value of the Secret you have created for the registered App.
- DashboardConnection String y StorageConnection String: enter the connection string of the storage you created.
- Recommendation: select "Update Application Settings and Virtual Directory".
-
Tenant ID: to get this information, go to your Azure Directory -> Properties.
-
In the next step, a selection box will be displayed with the available domains for generating the certificates. By keeping [Ctrl] clicked you can use multiple selection and choose the ones you want. The most common ones are www.[domain] and [domain], without www.
-
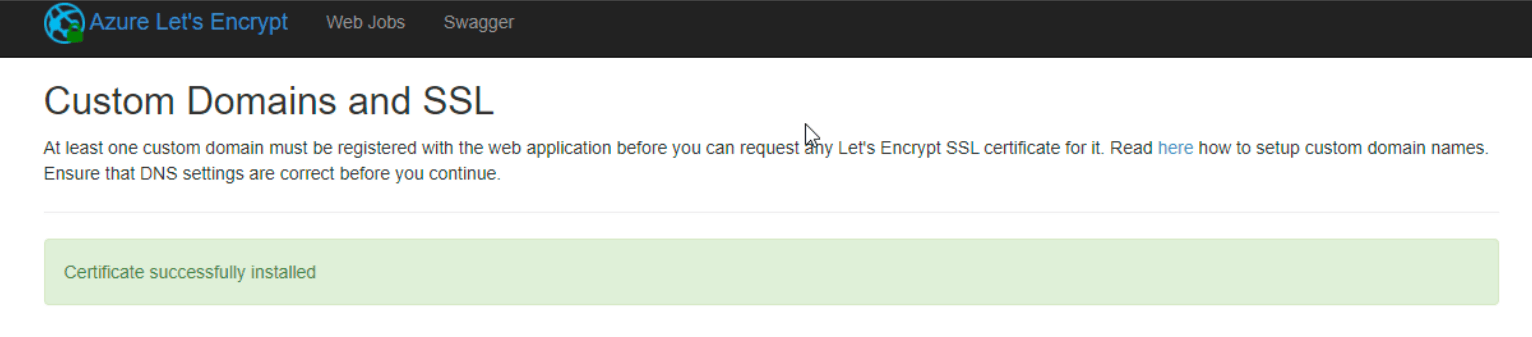
Click on Register and, if everything has gone well, you will see the following confirmation:
-
To check, go to your Web App, to the "Custom Domains" section.
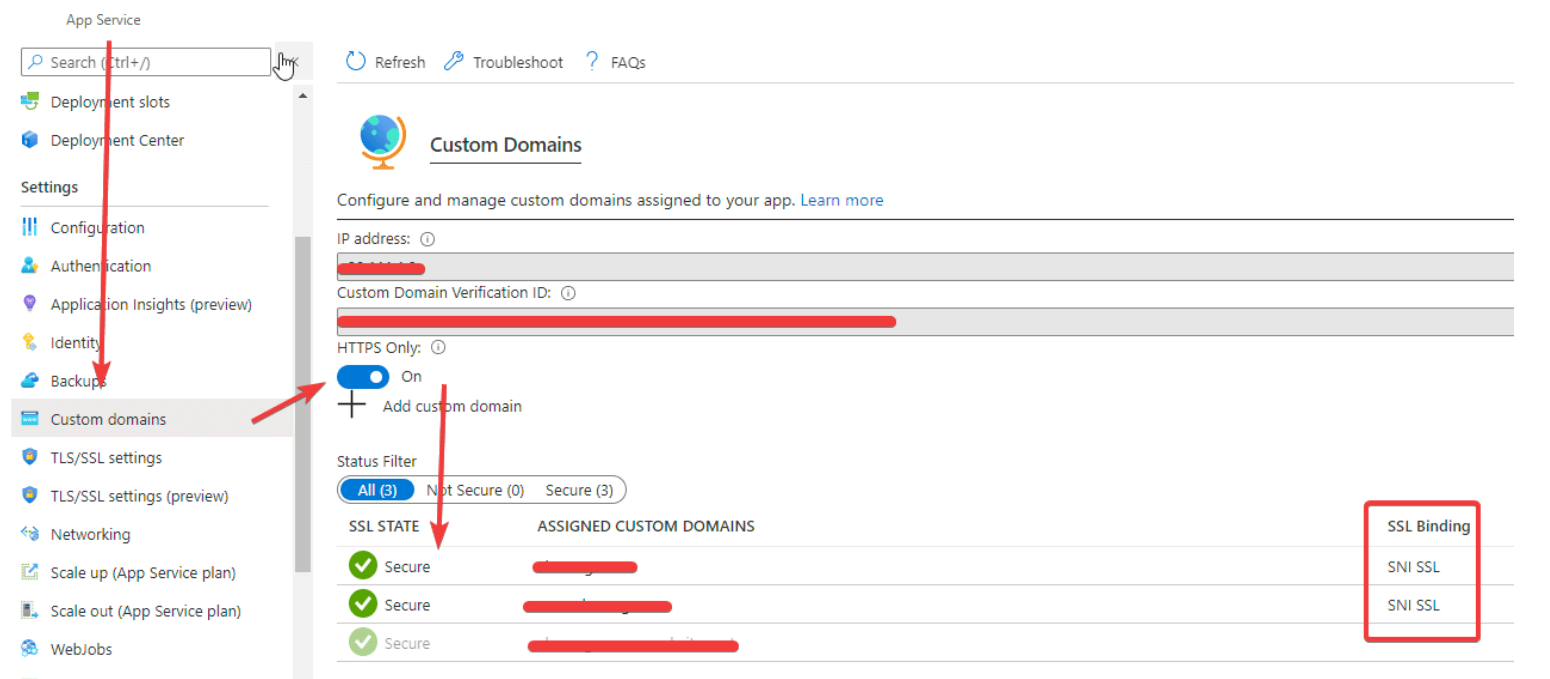
Done! you can now enjoy Let’s Encrypt certificates and provide extra security to your site visitors.

Gustavo E. Padial Odorico
Technical leader at Virtusway
Discover how we can help you
Please leave us your question and one of our assistants will contact you asap.